|
Installation of 4 x Ultra HD IP System
Normal Set-Up
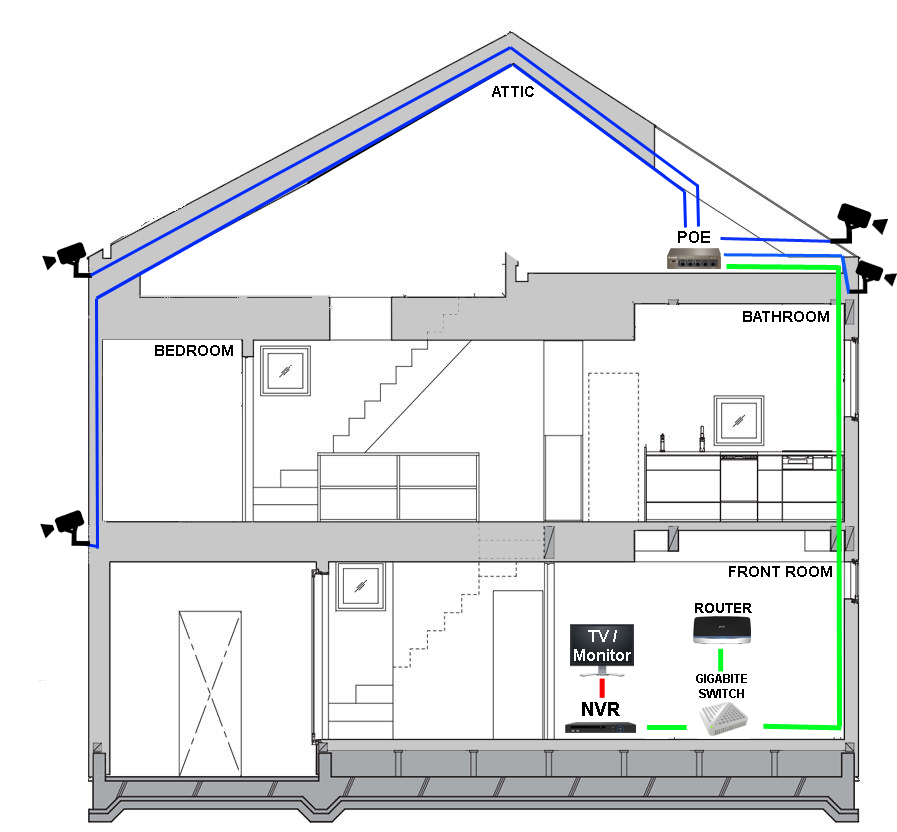
This diagram below shows you one method of setting up a 4 Camera IP System in your home. This diagram demonstrates how you would run this system when your PoE Switch is in the attic.
Before you start this set-up, you will need to choose a room in your home where you would like the NVR and Monitor (optional) to sit. Importantly, this room needs have access to your router.
Your router does not have to be the same room as your system, but if you want to be able to view this CCTV system on your phone or elsewhere in the building via the internet, you must have a cable connecting your router to the your NVR.
The advantages of running your system this way are; less cable, less time laying cable and the cables can be hidden in beams. The disadvantages, however, are: the PoE Switch is out of reach and connections are hard to reach.
Attic Set-Up
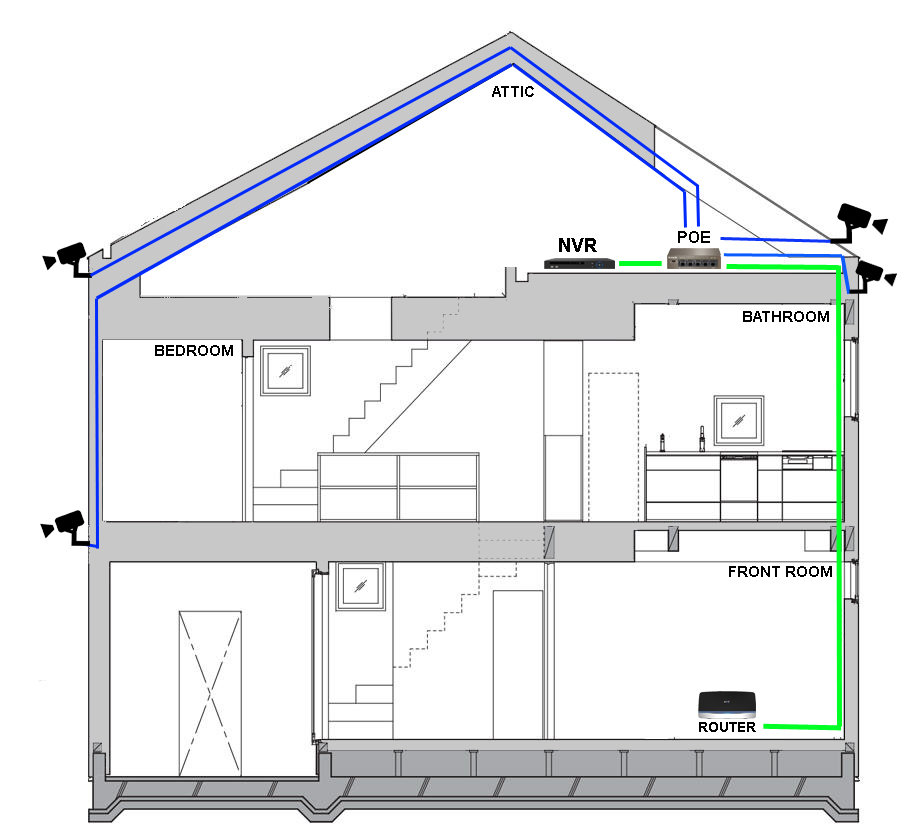
Another way, is to operate your whole system from the attic - see below. This is where both the NVR and PoE switch are located in the attic. The system is set up exactly the same as if the NVR were downstairs, however, there needs to be one cable running downstairs from the attic to connect to the router to one of your PoE Switch into a non-PoE port.
The advantages of running your system this way are: less cable, less time laying cable, the cables can be hidden in beams and you only have to run one cable into your house.
The disadvantages are: both NVR and PoE Switch are out of reach; connections are hard to reach, and you have to run a long cable down for the monitor and mouse.
When you initially set the system up, you will need a monitor to obtain the QR code so that you are able to view this system on your phone or computer if you wish, you need to make sure your system is connected to your router before trying to view online too.
If you want to view your system via a monitor, all you have to do is connect a HDMI cable to the HDMI port on the back of the NVR, to the port on the back of the monitor. (You can also view on monitor via VGA cable).
Please remember if you wish you access your setting of your NVR you will also have to run a USB mouse extension along with the HDMI cable.
Downstairs Set-Up
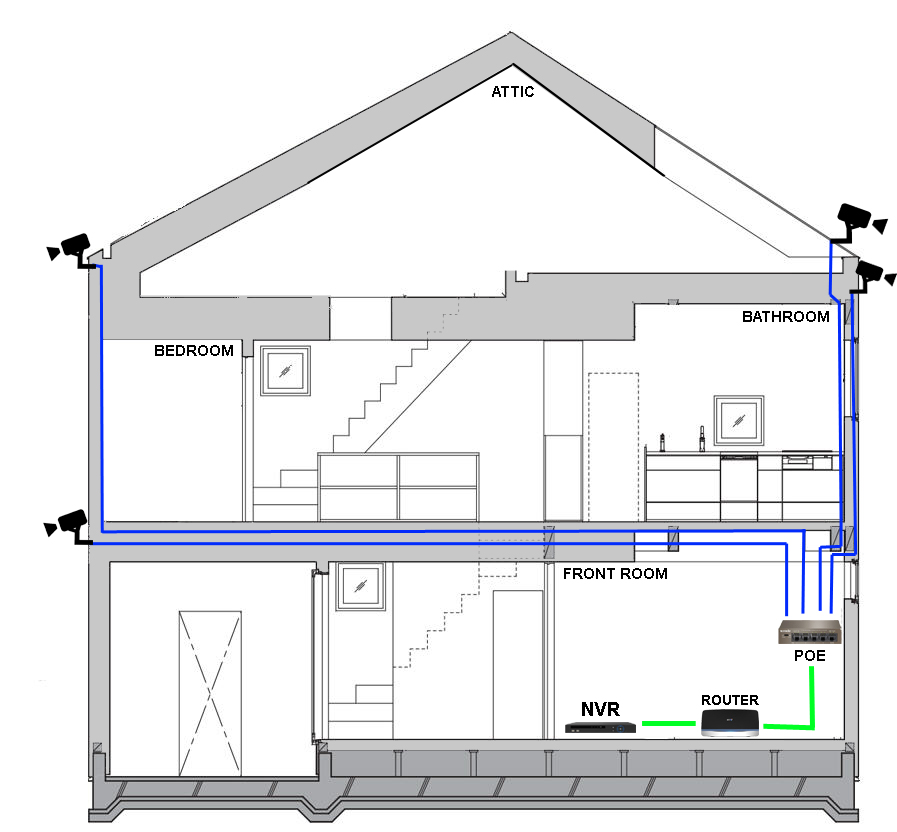
Another way of setting up this system is have everything in the one room, with no equipment in your attic.
Before you start, you will need to choose a room in your home where you would like the NVR and Monitor (optional) to go.
In this room, there needs to be access for a cable to connect the NVR to your router.
Your router doesn’t have to be the same room as your system but if you want to be able to view this CCTV system on your phone or building elsewhere via the internet you must have a cable connecting your router to the your NVR.
The advantages of running your system this way are: everything is in the same place, and you can easily check all connections.
The disadvantages are: you have to run a lot of cable out for the camera, and these cables have to run along walls/roofs.
|

